
Did your New Year come with many plans and ideas? If you're like us—it certainly hasn't brought a shorter "to-do" list. If one of the things on your list is updating your Sandvox web site, let us offer a little help with customizing your site's menu.
If you've already worked with the Page inspector to Add or Remove pages from your site menu, feel free to skip ahead to the next article in this newsletter. If not, read on to find out how to easily work with the site menu when adding new pages to your web site or remove old ones. We've built a walk-thru of the steps, with tips you can read and refer to as you work.
Imagine that today, your Sandvox web site has a blog, a couple of photo albums, and a contact page. You want to add one more page and you will be ready to publish. So you add the page, and it appears in the Site Navigator, just like all your previously created pages. Then you notice something: it doesn’t appear in the web site's menu! Where is it? Why not?
Adding and Removing Items
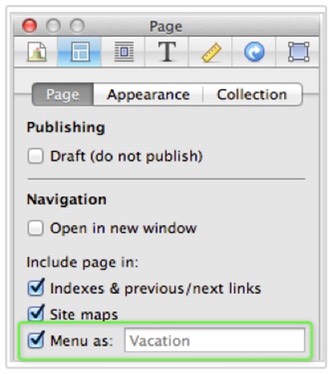
By default, only the first six pages that are added underneath the Home Page are automatically added to the web site's menu. Now, what if you want to include other pages in your site's menu, or hide some of the pages that were automatically added? Sandvox provides a simple way to do exactly that. Just select a page (or multiple pages) from the Site Navigator, open the Page Inspector, and under the “Include page in:” section, either check the “Menu as:” checkbox if you want the page displayed in the menu or un-check it if you want the page hidden from the web site's menu.
You can change the way the title of a page appears in a site's menu through the text field next to the check box. This can come in handy if you have a lot of items to include in the web site's menu and would like to shorten the menu items displayed (for more space). It allows you to keep the page title itself the same, and just adjust the text for the menu item itself.
So to illustrate the use of this technique, say we have a page whose title is "Report of the Committee to Shovel More Snow"—which is long for use in a menu. An example of a "shortened" name for display in the web site's menu for such a page might be "2012 Report", which still gives the visitor a sense of the information to be found on the page.
Additional Tools
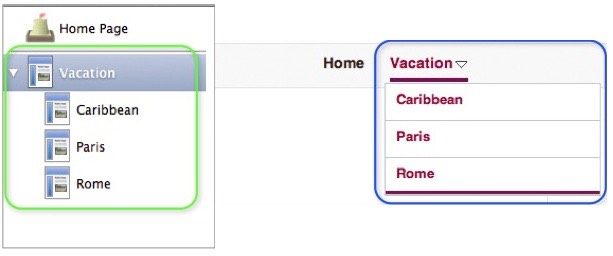
Sorting items in a web site's menu is easy, too. Pages appear in the web site menu in the same order they do in the Site Navigator. When you rearrange the pages in the Site Navigator, the web site menu updates in real-time to reflect the changes. The main, and any sub-menus reflect the order of the pages in the Site Navigator.
To help you make your site easy to navigate, most of the built-in designs Sandvox offers allow you to add pop-up sub-menus. A sub-menu item can be added by creating a new page within a collection or by dragging a page over another page in the Site Navigator. And, when it comes to adding, removing, renaming, and ordering items, working with sub-menus is just like working with a "main" menu.
A Word of Advice
A site with many pages in the site menu can get confusing to visitors, or tricky to navigate. As you create websites with Sandvox, you will come to realize that the six-item default for the Site Menu is a convenience and a good model for creating a good-looking and easy-to-navigate website. Thoughtfully organized information is key to providing a great experience for visitors.
TIP: When you are working on your site, ask yourself: 1) Does my site's navigation help visitors access important information quickly or does it slow them down? 2) Does my site menu look pleasing or does it clutter the rest of my site? Don't stress out too much on the answer. The decision you make today, you can revisit in the future, and implement your new decision in minutes. As you continue to work on your site, we wish you lots of fun.